How To Diagnose and Fix Water Heater Thermostat Problems
Imagine stepping into a shower only to be greeted by an icy blast instead of the comforting warmth you expected. Or perhaps you’ve experienced the opposite, where the water scalds your skin because the temperature soared beyond control. These frustrating scenarios often point to a malfunctioning water heater thermostat. This small but mighty component diligently regulates water temperature, ensuring that your home remains cozy and your showers pleasant.
When the thermostat falters, it can wreak havoc on your daily routine, leading to inconsistent water temperatures or, worse, no hot water at all. Beyond personal discomfort, these issues can inflate your energy bills as the heater works overtime to compensate for faulty readings. Acting swiftly to diagnose and fix these problems can save you from potential headaches and unnecessary expenses down the line.
You can handle many of these thermostat troubles with a few tools and some straightforward steps. By taking matters into your own hands, you can restore your hot water supply and gain the satisfaction of maintaining your home’s comfort and efficiency. Dive into this guide and discover how to diagnose and fix water heather thermostat problems.
Common Signs of Thermostat Problems
A water heater thermostat that’s on the fritz can present several telltale signs, each impacting your daily routine in different ways.
Inconsistent Water Temperature
One moment, the water is lukewarm, and the next, it’s scalding hot or freezing cold. This fluctuation often suggests the thermostat is not accurately reading the water’s temperature.
Too Little or Too Much Hot Water
A lack of hot water highlights a potential failure in the thermostat, where it may not be signaling the heater to activate at all. On the flip side, if the water is too hot, the thermostat might be stuck on a setting that continuously heats the water beyond safe levels. This can pose great liability for commercial tankless water heaters, as customers or clients can be harmed by the malfunction.
High Energy Bills
A sudden spike in your energy bills without a change in water consumption habits might point to a thermostat that’s causing the heater to work harder than necessary.
Tools Needed for Diagnosis and Repair
Tackling thermostat problems requires a few essential tools that make the process straightforward and safe:
- Screwdriver: A basic screwdriver set will help you open the access panels on the water heater, allowing you to reach the thermostat.
- Multimeter: This little tool is indispensable for diagnosing electrical issues by testing voltage and continuity; it helps confirm whether the thermostat is functioning correctly or if replacement is necessary.
- Gloves: Insulated gloves protect you from electric shocks during the repair process. They add a layer of safety, especially when handling electrical components.
- Flashlight: A flashlight helps illuminate the darker areas inside the water heater, ensuring you can see clearly when inspecting or working on the unit.
- Replacement parts: Having a replacement thermostat on hand is wise, so you’re ready to swap out the faulty unit if needed.
- Plumber’s tape: A good roll of tape is useful for sealing connections after you’ve completed the repair, preventing any potential leaks.
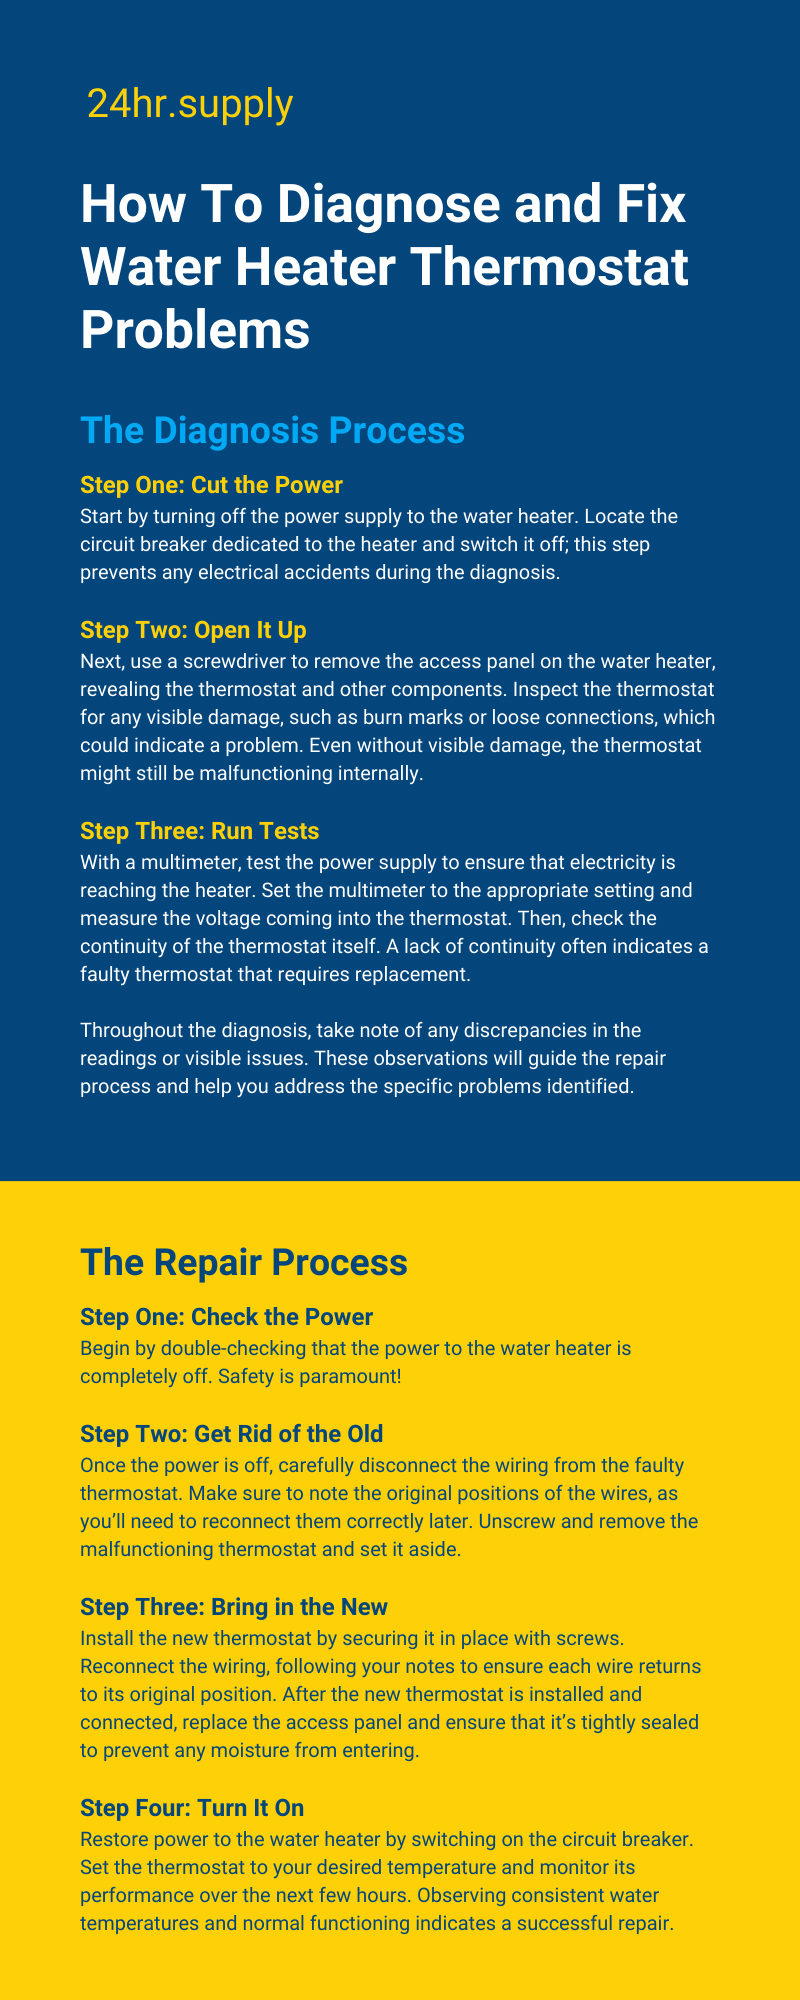
The Diagnosis Process
Diagnosing a water heater thermostat problem involves a series of methodical steps that help you identify the root cause.
Step One: Cut the Power
Start by turning off the power supply to the water heater. Locate the circuit breaker dedicated to the heater and switch it off; this step prevents any electrical accidents during the diagnosis.
Step Two: Open It Up
Next, use a screwdriver to remove the access panel on the water heater, revealing the thermostat and other components. Inspect the thermostat for any visible damage, such as burn marks or loose connections, which could indicate a problem. Even without visible damage, the thermostat might still be malfunctioning internally.
Step Three: Run Tests
With a multimeter, test the power supply to ensure that electricity is reaching the heater. Set the multimeter to the appropriate setting and measure the voltage coming into the thermostat. Then, check the continuity of the thermostat itself. A lack of continuity often indicates a faulty thermostat that requires replacement.
Throughout the diagnosis, take note of any discrepancies in the readings or visible issues. These observations will guide the repair process and help you address the specific problems identified.
The Repair Process
Repairing a faulty water heater thermostat can often be done with a bit of patience and the right approach.
Step One: Check the Power
Begin by double-checking that the power to the water heater is completely off. Safety is paramount!
Step Two: Get Rid of the Old
Once the power is off, carefully disconnect the wiring from the faulty thermostat. Make sure to note the original positions of the wires, as you’ll need to reconnect them correctly later. Unscrew and remove the malfunctioning thermostat and set it aside.
Step Three: Bring in the New
Install the new thermostat by securing it in place with screws. Reconnect the wiring, following your notes to ensure each wire returns to its original position. After the new thermostat is installed and connected, replace the access panel and ensure that it’s tightly sealed to prevent any moisture from entering.
Step Four: Turn It On
Restore power to the water heater by switching on the circuit breaker. Set the thermostat to your desired temperature and monitor its performance over the next few hours. Observing consistent water temperatures and normal functioning indicates a successful repair.
Safety Precautions
Always start by turning off the power supply to the unit. Locate the correct circuit breaker and switch it off before beginning any diagnostic or repair work.
Using insulated tools and gloves minimizes the risk of electrical shocks. These precautions are essential, especially when handling wiring and other electrical parts. Ensure that all connections are secure before restoring power to prevent short circuits, which can cause further damage.
Pro Tip: Know Your Skill Level
If the diagnosis reveals complex problems or if you feel uncertain at any stage, consult a professional. Expert assistance ensures that repairs are done safely and effectively.
Now What?
Taking charge of your water heater thermostat empowers you to tackle immediate issues and sets you on a path toward better home management and efficiency. By understanding how to diagnose and fix common water heater thermostat problems, you gain the ability to prevent disruptions to your daily routines and enjoy a reliably warm home environment.

Recent Posts
-
What Causes Pipe Corrosion?
Pipe corrosion occurs when metal reacts with water, oxygen, and minerals over time. Factors that spe …Feb 2nd 2026 -
Commercial vs. Residential Plumbing: 15 Key Differences You Need to Know
Plumbing might seem straightforward at first glance, but residential and commercial systems are fund …Feb 2nd 2026 -
What Is a Circulator Pump and How Does It Work?
Water needs to keep moving efficiently in plumbing and HVAC systems, and that’s where a circulator p …Feb 2nd 2026


